If you walk into a pet store looking for a litter box, you usually find two options: tiny, overpriced trays or expensive robotic machines.
But here is a secret the pet industry doesn’t want you to know: The best litter box isn’t sold in the pet aisle. It’s in the storage section of your local hardware store.
Doing it yourself cat litter box is one of the easiest and most rewarding projects for a cat owner. Not only does it save you money (it costs less than $15!), but it also gives your cat exactly what they crave: space, privacy, and cleanliness.
In this guide, I will show you how to turn a simple plastic storage bin into a luxury bathroom for your cat that is better, bigger, and sturdier than anything you can buy.
Why Choose a DIY Litter Box?
You might be wondering, “Why should I make a do it yourself cat litter box when I can just buy one?” Here is why:
- Size Matters: Most commercial litter boxes are too small. A cat needs to be able to turn around without touching the sides. A storage bin offers double the volume of a standard tray.
- High Sides: If your cat is a “kicker” (kicks litter everywhere) or an “elevator butt” (pees while standing up), high sides keep everything inside the box.
- Odor Control: A larger box allows for better airflow, which dries out waste faster and reduces smell.
- Customizable: You decide where the entry goes. Have a senior cat? Cut it low. Have a dog who eats “cat treats”? Cut it high (top entry).
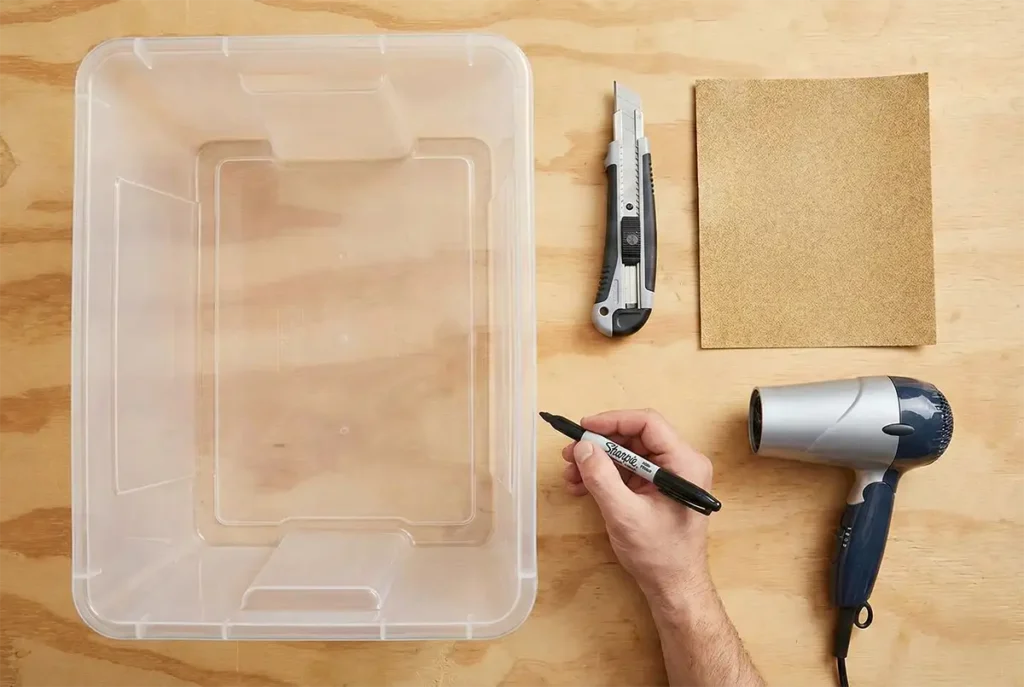
The Tool Kit: What You Need
You don’t need a garage full of power tools. Here is your shopping list:
- A Large Plastic Storage Bin: Look for one that is at least 18-20 gallons. Crucial Tip: Make sure the bottom inside is FLAT. Avoid bins with deep ridges or indentations on the bottom, as they make scooping a nightmare.
- Utility Knife or Box Cutter: To cut the plastic.
- Sandpaper (Medium Grit) or a Hair Dryer: This is the most important safety tool to smooth sharp edges.
- Permanent Marker: To draw your outline.
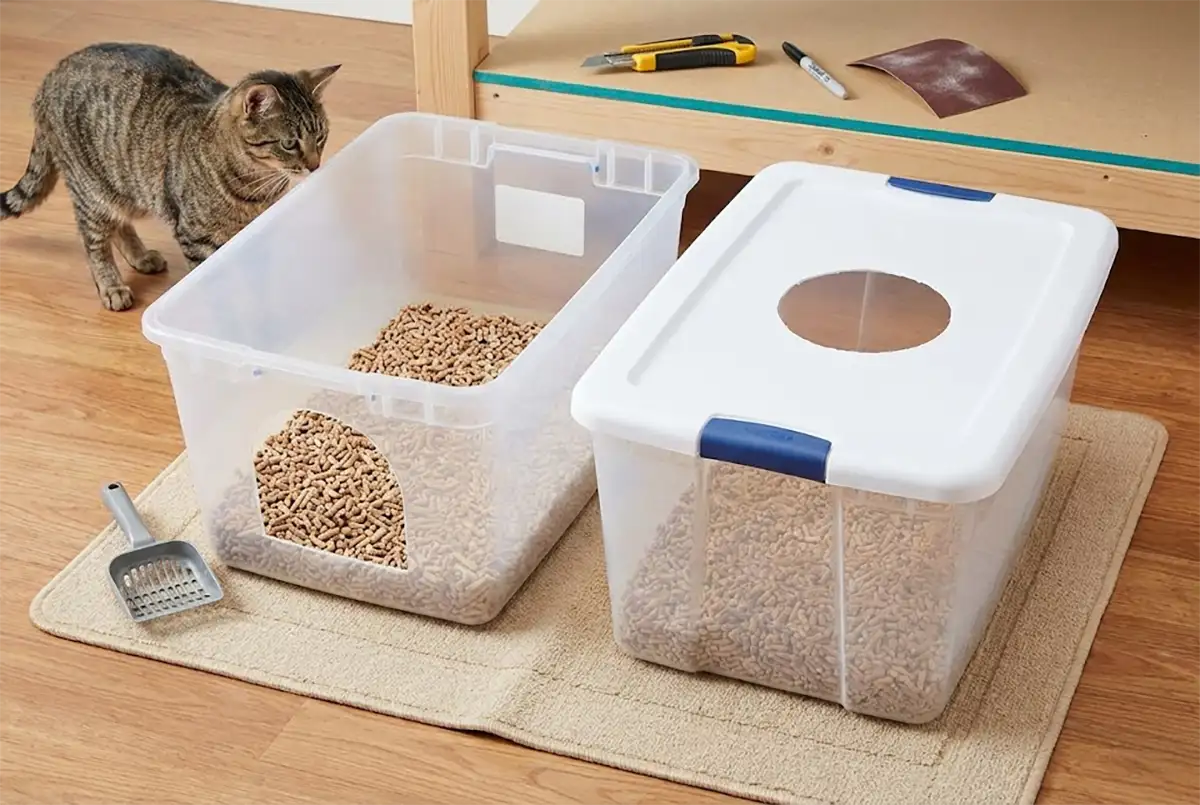
Step-by-Step: The “High-Sided” Open Box (Best for Most Cats)
This design is perfect for 90% of cats. It keeps the litter contained but is easy to enter.
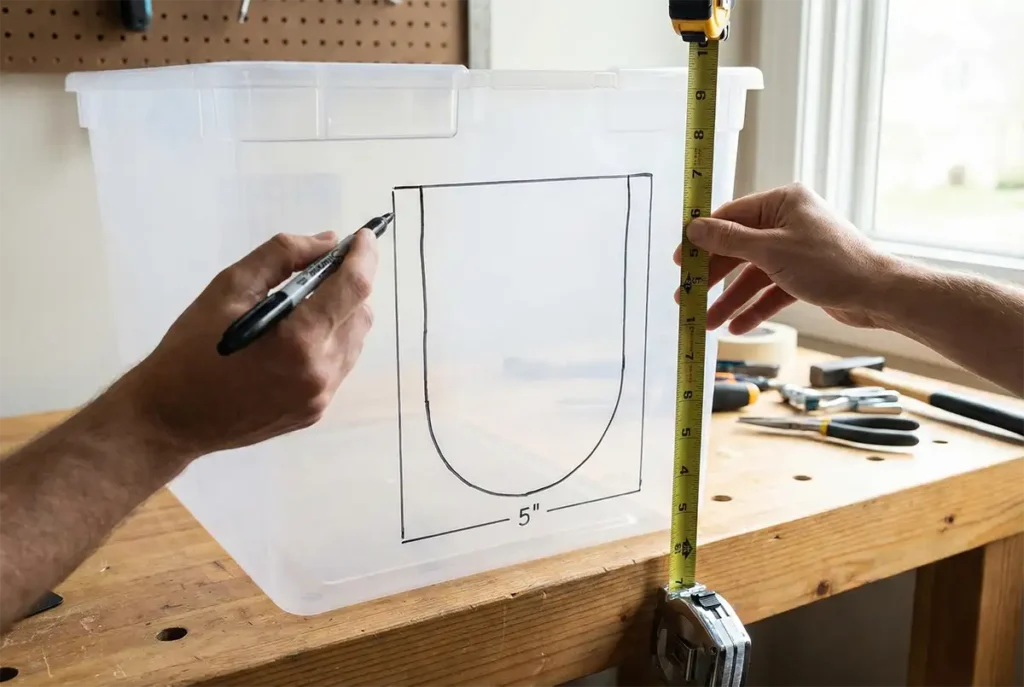
Step 1: Measure the Door
Decide which side you want the entry on. For a standard cat, mark an opening about 5 to 6 inches from the floor. This is low enough for them to step in easily but high enough to keep the litter inside. Draw a “U” shape or a square with rounded corners using your marker.
Note for Senior Cats: If your cat has arthritis or mobility issues, make the entry lower (about 3-4 inches) so they don’t have to jump.
Step 2: Cut carefully
Using your utility knife, slowly cut along the line. Don’t rush. If the plastic is very thick, you can heat the blade with a lighter for a few seconds to slice through it like butter.
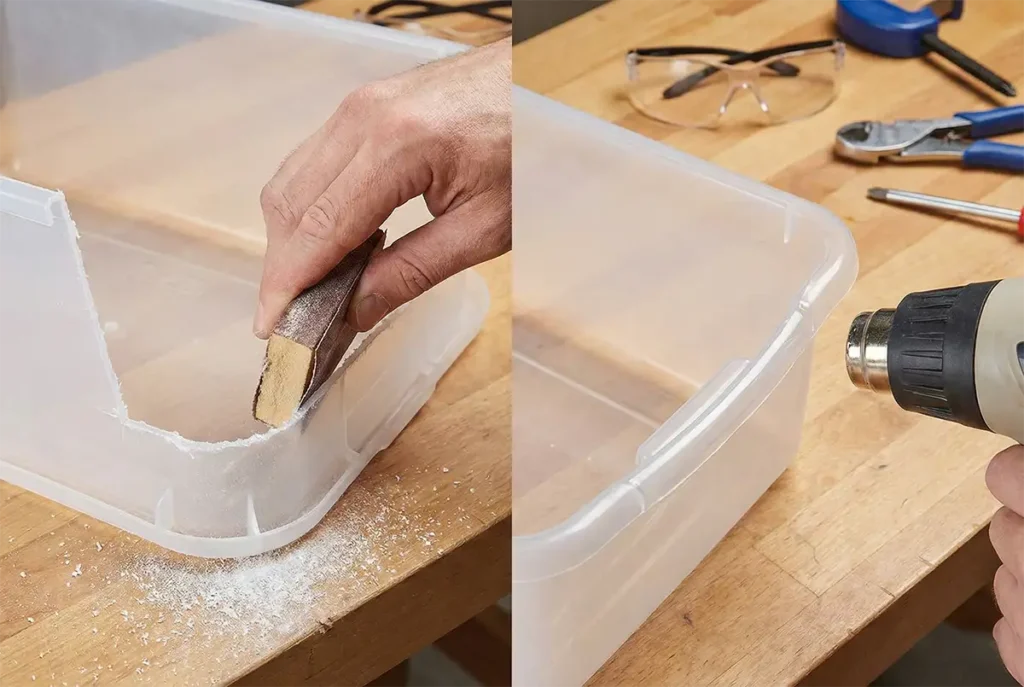
Step 3: The Safety Step (Don’t Skip This!)
Freshly cut plastic is razor-sharp. It can easily slice your cat’s belly or paws.
- Method A: Use sandpaper to vigorously rub the cut edges until they are completely smooth and rounded.
- Method B (Pro Hack): Use a hair dryer or heat gun on high heat. Run it along the cut edge. The heat will slightly melt the plastic, creating a perfectly smooth, rounded rim.
The “Top-Entry” Variation (The Anti-Tracker)
If your cat tracks litter all over the house, or if you have a dog who likes to snoop in the box, a top-entry do it yourself cat litter box is the solution.
- Leave the Box Intact: Do not cut the sides of the bin.
- Cut the Lid: Instead, cut a round hole (about 8-10 inches in diameter) directly in the center of the lid.
- Smooth the Edges: Sand the hole perfectly smooth.
- Snap the Lid On: Your cat will jump on top, enter through the hole, do their business, and jump out. The lid acts as a mat that catches litter from their paws.
Warning: Do not use this method for senior cats or large breeds like Maine Coons who might feel trapped.
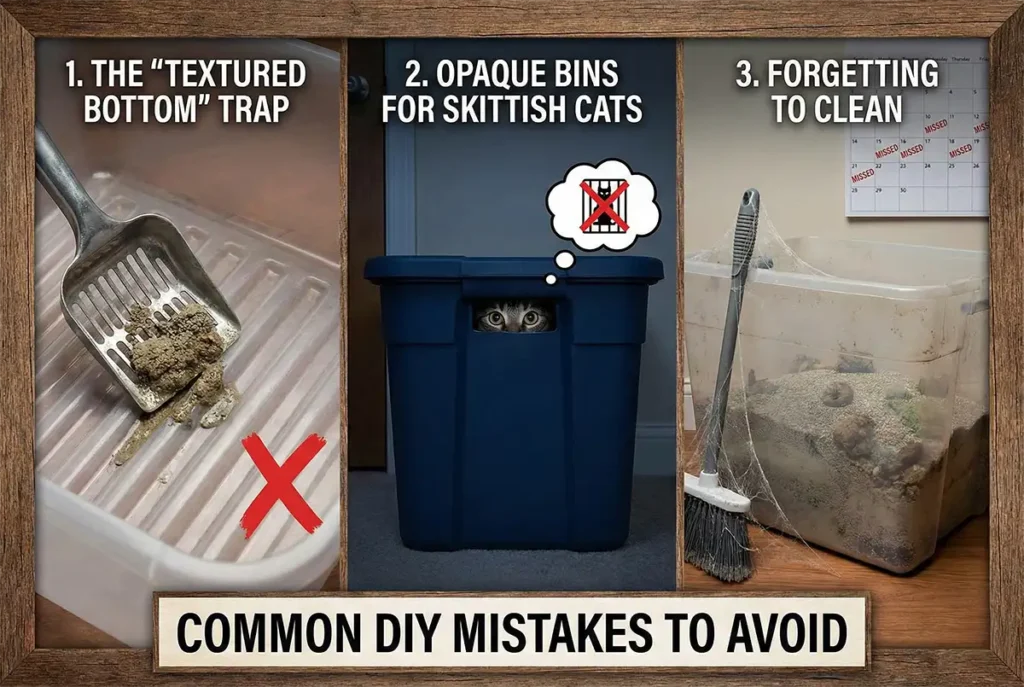
Common DIY Mistakes to Avoid
Even though it’s simple, I have seen many people make these mistakes:
- The “Textured Bottom” Trap: I mentioned this before, but it’s worth repeating. If the bottom of your bin has ridges, the scoop will get stuck, and wet litter will hide in the grooves. Always check the inside before buying!
- Using Opaque Bins for Skittish Cats: Some cats feel trapped in dark, solid-colored bins. If your cat is nervous, buy a clear/translucent bin so they can see out while doing their business.
- Forgetting to Clean: Just because the box is huge doesn’t mean you clean it less. In fact, a bigger surface area needs a good scrub. Check out our guide on the Best Way to Clean a Cat Litter Box for a chemical-free routine.
Final thoughts
Making your cat litter box may be a weekend project that takes less than 20 minutes but provides years of comfort for your cat. It’s cheaper, cleaner, and frankly, smarter than buying a fancy tray.
Grab a storage bin today, customize it to your cat’s needs, and say goodbye to litter tracking forever!